Day20:20 - 结帐服务(4) - PayPal Python Checkout SDK(2)
ನಮಸ್ಕಾರ,我是Charlie!
在Day19当中我们完成了Paypal的注册并且试着发了request,在今天我们将看paypal的发送request规则,并且实际使用python checkout sdk试试看。
================================◉‿◉=================================
首先是paypal request的格式的部分,先看一下我们上次打create order api的资料:
{
  "intent": "CAPTURE",
  "purchase_units": [
    {
      "amount": {
        "currency_code": "USD",
        "value": "100.00"
      }
    }
  ]
}
这里面有两个参数:intent跟purchase_unit。
首先是intent,intent是这个request最终的目的,有两种参数可以传入:
Capture: 当order要在payment成立後capture时传入的参数,通常create order会使用此intent。
Authorize:授权,如果没有要在payment成立後立即capture,使用此参数。
再来是purchase_unit的部分,purchase_unit指的是购买的单位,里面的amount又分为currency_code跟value的部分:
currency_code:货币,详细的货币单位可以参考此网站:https://developer.paypal.com/docs/api/reference/currency-codes/,遵守three-character ISO-4217规范。
value:价格,item要支付的所有价格。
以上是最小规格的order request body,像amount的话会有breakdown,可以分成像是tax、shipping等等的。
但是在应用程序使用paypal sdk当中,还需要另外一个参数:application_context。这里面装了一些应用程序所需的资讯跟动作,我们可以直接到python paypal sdk的github page,看到capture order里面的build_request_body的资料格式:
{
     "intent": "CAPTURE",
     "application_context": {
     		"return_url": "https://www.example.com",
           "cancel_url": "https://www.example.com",
           "brand_name": "EXAMPLE INC",
           "landing_page": "BILLING",
           "shipping_preference": "SET_PROVIDED_ADDRESS",
           "user_action": "CONTINUE"
     }, .....
里面有一些比较重要的参数,像是:
return_url:payment成功後,需要前往的url
cancel_url:payment取消後,需要前往的url
这两个是最需要设定的部分,在使用者进行付款後,转回我们自己原本的页面。
所以这里的流程会是:
使用者点击结帐按钮 => 前端呼叫後端create order api => 後端create order api利用paypal checkout sdk打paypal api => 後端取得连结传回前端 => 前端将使用者导入付款页面 => 使用者付款 or 取消 => 返回各自页面
而capture的话就是使用url中带order_id来做capture,一样需要Authorization的部分。
而Python checkout sdk就是直接帮我们带了Authorization,让我们只要使用createOrder跟captureOrder就可以了。
接下来是Python checkout sdk,先使用pip install来安装:
$ pip install paypal-checkout-serversdk
安装完後,到我们的後端专案,在payaplTools里面建立三个py档:
createOrderClient.py
captureOrderClient.py
paypalClient.py
接着到manage.py,设定环境变数:
    os.environ.setdefault('PAYPAL_CLIENT_ID','Your default client id')
    os.environ.setdefault('PAYPAL_CLIENT_SECRET','Your default client secret')
然後到tools\paypalClient中,建立paypalClient class:
import os
from paypalcheckoutsdk.core import PayPalHttpClient,SandboxEnvironment

import sys

class PaypalClient:
	def __init__(self):
		self.client_id = os.environ["PAYPAL_CLIENT_ID"] if 'PAYPAL_CLIENT_ID' in os.environ else ""
		self.client_secret = os.environ["PAYPAL_CLIENT_SECRET"] if 'PAYPAL_CLIENT_SECRET' in os.environ else ""
		self.environment = SandboxEnvironment(
			client_id = self.client_id,
			client_secret = self.client_secret
		)
		self.client = PayPalHttpClient(self.environment)
接着先建立createOrderClient:
from paypalTools.paypalClient import PaypalClient
from paypalcheckoutsdk.orders import OrdersCreateRequest

RETURN_URL = "http://localhost:8000/#/orderCreated"
CANCEL_URL = "http://localhost:8000/#/orderCanceled"

class CreateOrder(PaypalClient):

	@staticmethod
	def build_request_body(currency_code,value):
		print("currency_code is:",currency_code)
		return \
		{
			"intent":"CAPTURE",
			"application_context":{
				"return_url":RETURN_URL,
				"cancel_url":CANCEL_URL,
				"brand_name":"键盘贸易",
				"landing_page":"BILLING",
			},
			"purchase_units":[
				{
					"amount":{
						"currency_code":currency_code,
						"value":value
					}
				}
			]
		}


	def create_order(self,currency_code,value,debug = False):
		request = OrdersCreateRequest()
		request.headers['prefer'] = 'return=representation'
		request.request_body(self.build_request_body(currency_code,value))
		response = self.client.execute(request)
		if debug:
			print(response.result)
		return response
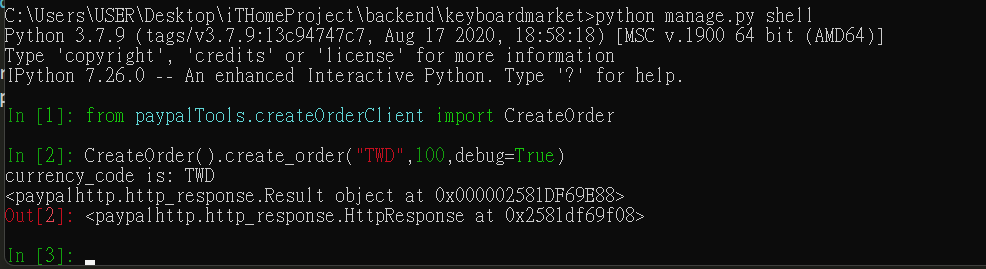
然後使用python manage.py shell进入django环境,并且引入createOrderClient进行请求:
from paypalTools.createOrderClient import CreateOrder

CreateOrder().create_order("TWD",100,debug=True)
如果印出HttpResponseObject即代表发送成功:
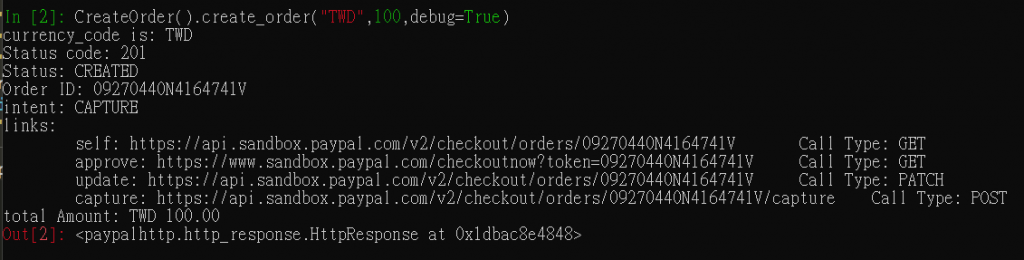
接着我们美化一下output:
def create_order(self,currency_code,value,debug = False):
	request = OrdersCreateRequest()
	request.headers['prefer'] = 'return=representation'
	request.request_body(self.build_request_body(currency_code,value))
	response = self.client.execute(request)
	if debug:
		print("Status code:",response.status_code)
		print("Status:",response.result.status)
		print("Order ID:",response.result.id)
		print("intent:",response.result.intent)
		print("links:")
		for link in response.result.links:
			print("\t{}: {}\tCall Type: {}".format(link.rel,link.href,link.method))
		print("total Amount: {} {}".format(response.result.purchase_units[0].amount.currency_code,
											response.result.purchase_units[0].amount.value))
	return response
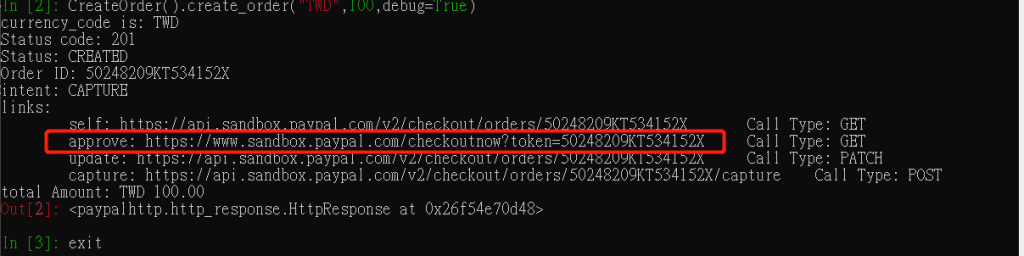
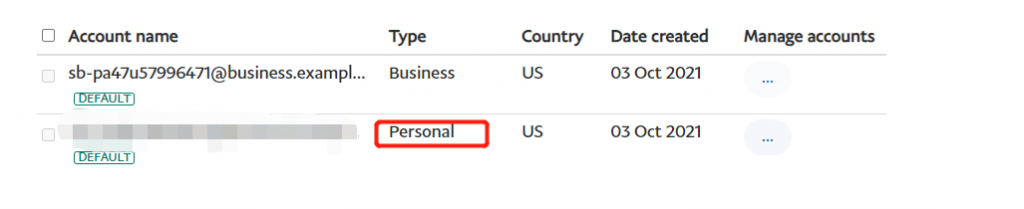
在此先笔记下order_id,然後前往apporve url用测试帐号付款:

再来是capture order的部分,这里我们需要order id传入:
from paypalTools.paypalClient import PaypalClient
from paypalcheckoutsdk.orders import OrdersCaptureRequest
class CaptureOrder(PaypalClient):
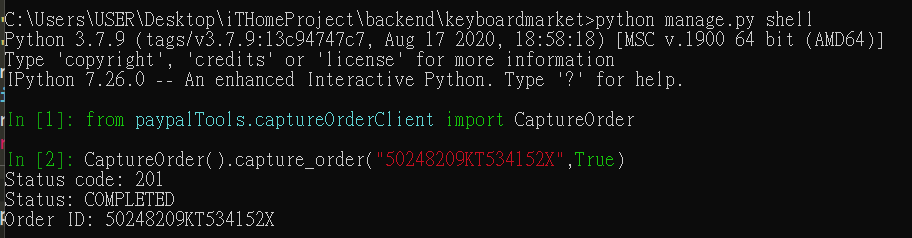
def capture_order(self,order_id,debug = False):
request = OrdersCaptureRequest(order_id)
response = self.client.execute(request)
if debug:
print("Status code:",response.status_code)
print("Status:",response.result.status)
print("Order ID:",response.result.id)
print("links:")
for link in response.result.links:
print("\t{}: {}\tCall Type: {}".format(link.rel,link.href,link.method))
for purchase_unit in response.result.purchase_units:
for capture in purchase_units.payments.captures:
print('\t',capture.id)
return response
测试:
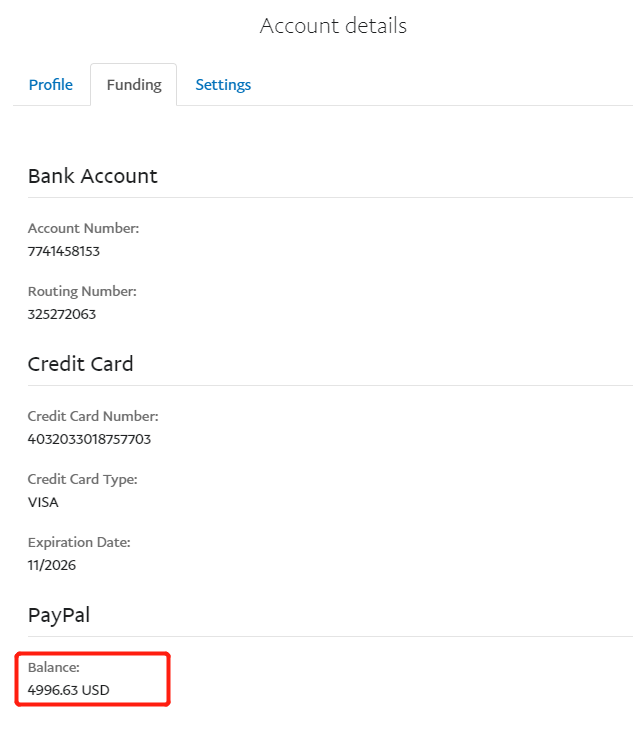
接着到余额处看,可以看到余额有变动:
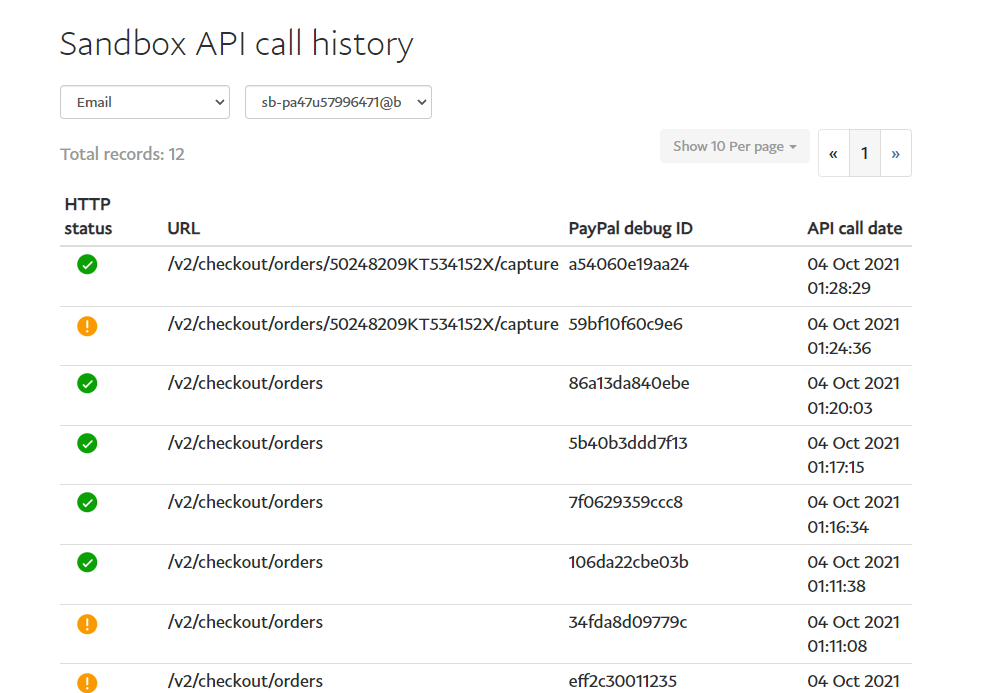
接着到API呼叫纪录中,可以看到已经呼叫过的纪录:
如此我们就先完成了Client的部分。
================================◉‿◉=================================
Day20结束了!在今天我们讲到了Paypal checkout sdk,还有如何使用,而明天我们将把Client跟结帐结合在一起,See ya next day!
冒险村06 - Auto-update dependencies
06 - Auto-update dependencies 除了 Release Drafter 及...
[Day 7]想不到有梗的标题LA(後端篇)
今天我们来看一下Native Camp用户设定,看一下有没有遗漏什麽栏位没有设置的, 这边可以看到可...
Ubuntu巡航记(1) -- 在Windows作业系统下安装Ubuntu
前言 机器学习的套件许多都不能在Windows作业系统内顺利安装,就算能安装也要费一番手脚,因此,兴...
[PHP][Laravel][Blade]利用asset()设定JS及CSS来源档案却无法使用?先看看...
我的档案来源是table_search.js,原本预设是放在resource资料夹中。 我将tab...
从原子习惯看爲什麽我需要组队参加 iThome 铁人赛
最近刚好读了「原子习惯」这本书,藉由此书的一些观点 提供大家一些关於组队参加铁人赛的想法 此篇会比较...