Day18 vue.js新增文章
延续昨日
今天我们来新增专案
首先需要先新增一个Addproject.vue
新增path 以及修改navbar里面新增专案的path
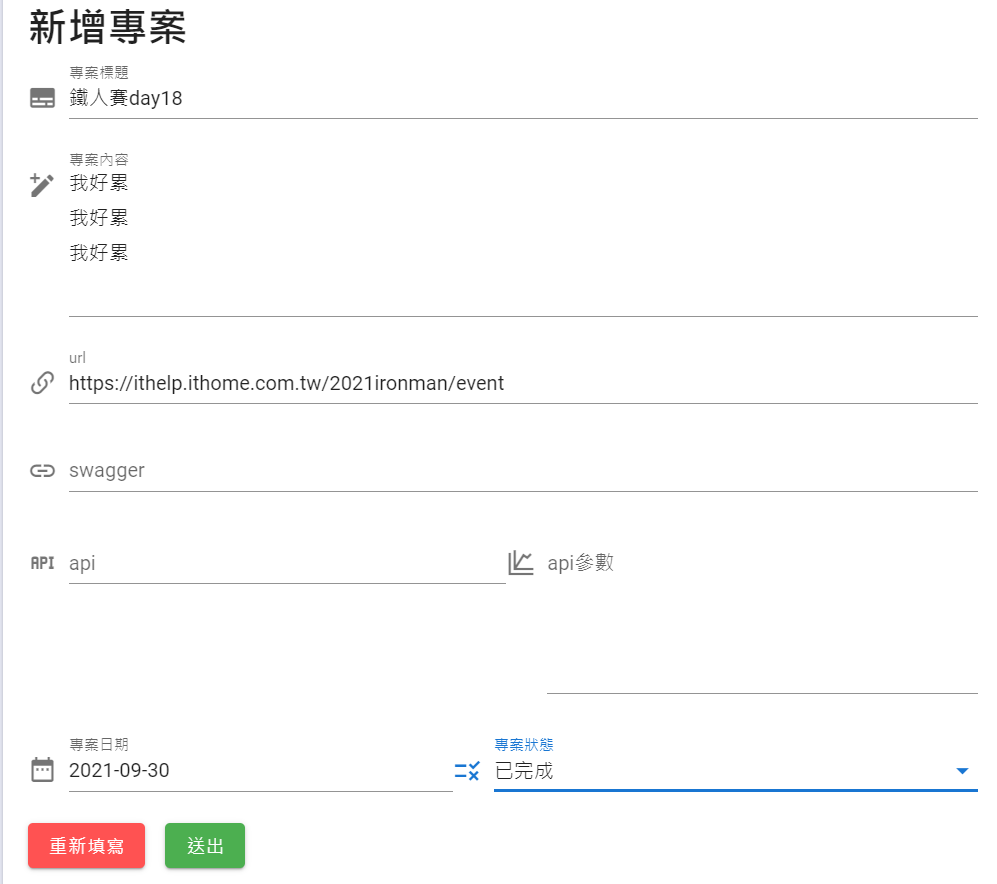
首先我们需要一个简单的layout
如下图
这边就是几个纯粹的text filed 或是 text area v-model绑定 没什麽好说的
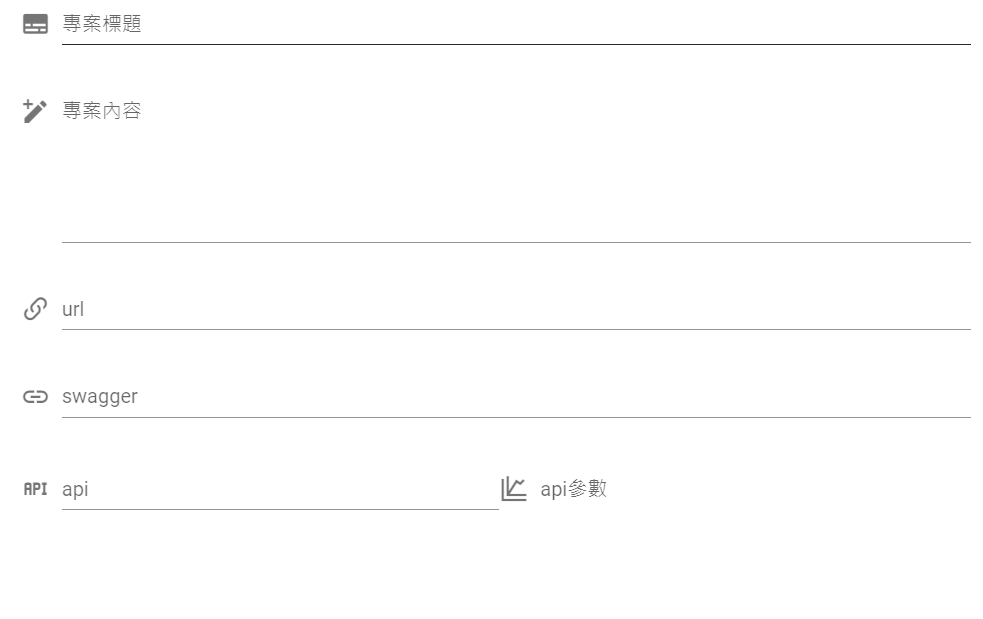
比较特别的是 专案日期 点开来会有日期可以选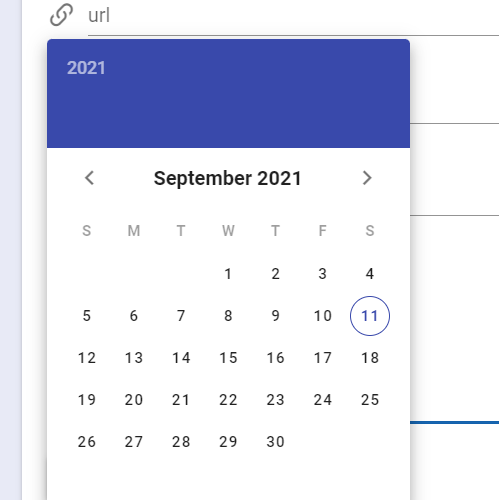
以下是我的程序码 我是参考vuetify的datepicker(感谢vuetify赞叹vuetify)
https://vuetifyjs.com/en/components/date-pickers/

直接复制vuetify网站的程序码来使用
再来用v-model绑定 datepicker
还有专案状态 点开来可以选择专案状态
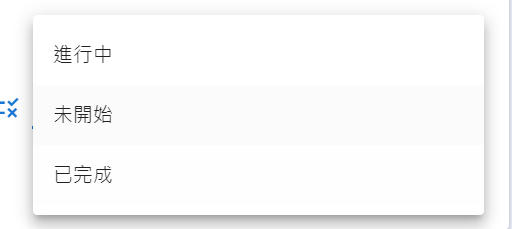
以下是程序码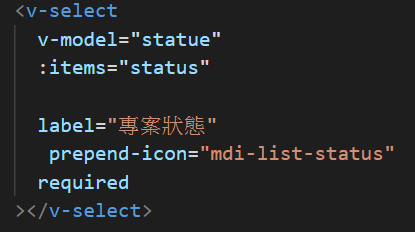
这边使用v-moel绑定statue 再来:item status 则是在data中设定
这就是整个layout 就阳春但是能用就好XD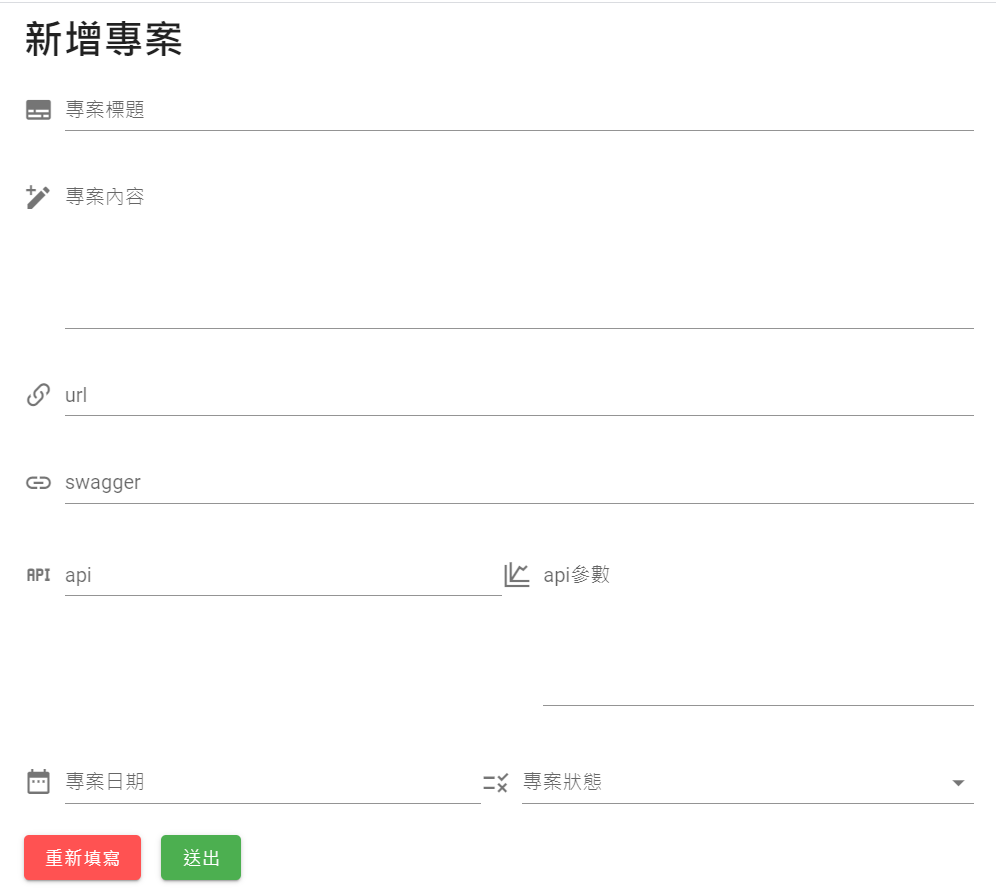
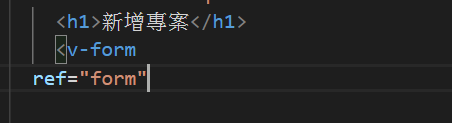
再来就是重新填写的按钮
在html tag 里面下一个ref 再来rest这个refs就好 参考day14
 methods:{
   reset () {
        this.$refs.form.reset()
      },
一样要在moounted 接session
mounted(){
      // let user=localStorage.getItem('user-info');
       let user=sessionStorage.getItem('user-info');


      if(!user){
        this.$router.push({name:'Login'})
        alert('请先登入')
      }

      this.username=JSON.parse(user).username
      this.useraccount=JSON.parse(user).id

    }
}
最後就是送出按钮
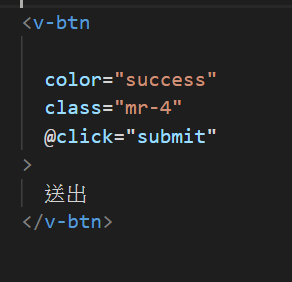
Function submit
基本上跟注册的方法没2样只是多了一些东西而已
async submit(){
     const result = await axios.post(`${this.db_api}`+"articles",{
         title:this.title,
         person:this.username,
         status:this.statue,
         content:this.content,
         time:this.time,
         useraccount:this.useraccount,
         url:this.url,
         swagger:this.swagger,
         api:this.api,
         api_val:this.api_val


       })

       if(result.status==201){
             alert("成功")
         this.$router.push({name:'Home'})
       }
   }
再来就是新增文章试试看!!
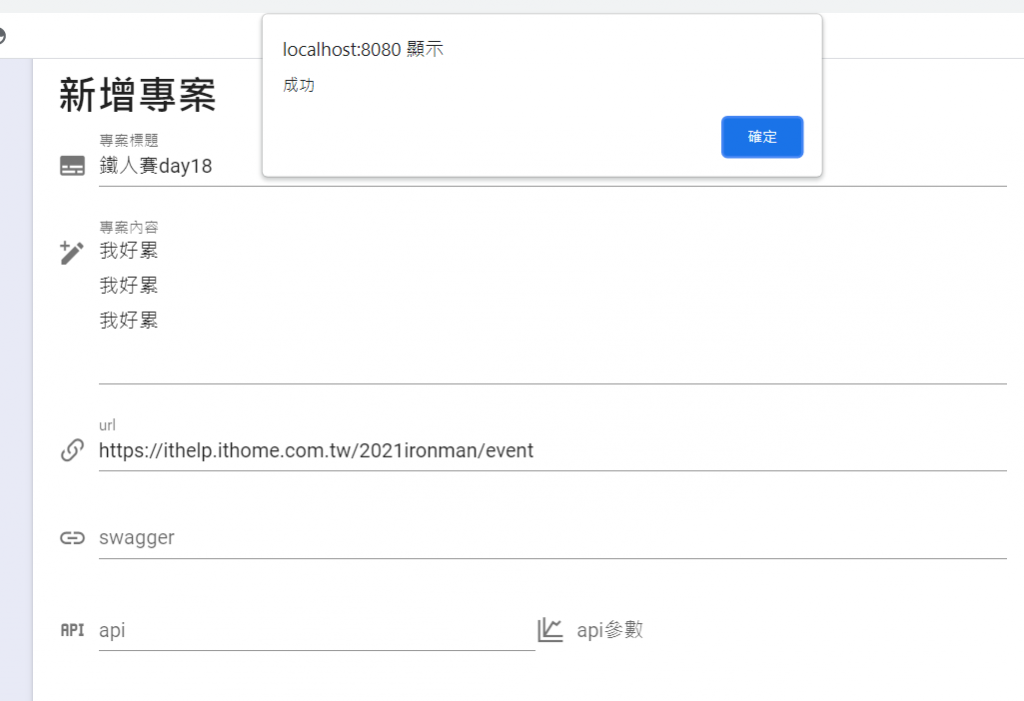
嘟嘟噜成功新增文章了
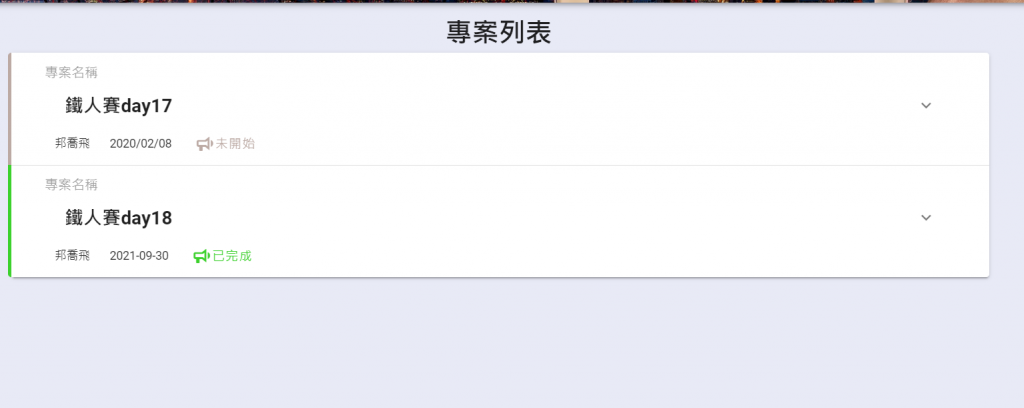
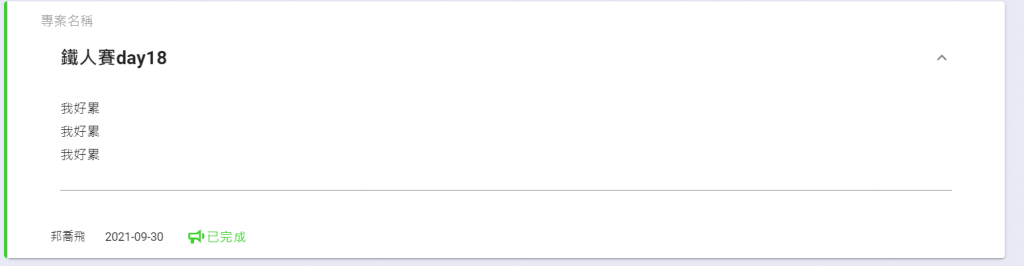
再确认一下db.json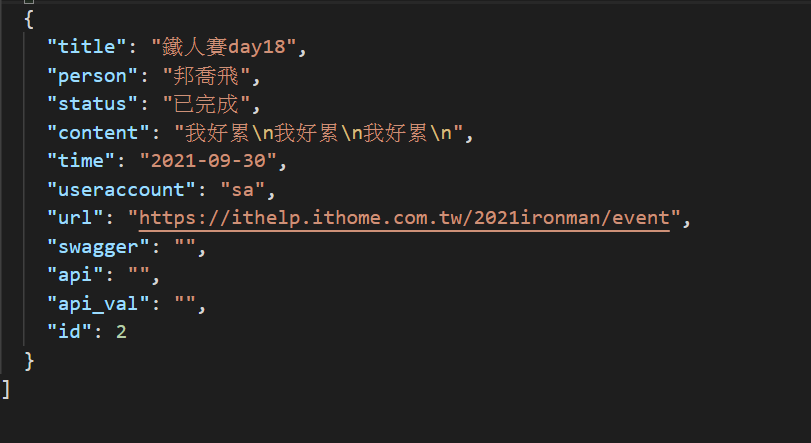
至於为什麽要有栏位swagger api api_val则是我们公司提出需要这几个栏位
所以我先设定 也没有下rule所以可以允许空值
好了今天就差不多这样了
明天就从我的专案开始吧!
<<: 【从零开始的Swift开发心路历程-Day18】简易订单系统Part2
>>: 从零开始的8-bit迷宫探险【Level 22】奥义隐身术 & 时间静止术
javascript函式与动态变更网页内容(DAY17)
在许多网页中我们都可以看到动态变更网页内容的身影,像是我们按下一个按钮,它就会做出相对应的事情呈现在...
[Day8] Docker 介绍
在前几篇文章我们学习了Django的基本专案建置, 相信大家在安装过程当中多少都会碰到一些问题,以及...
【Day28】Figma篇 : 实作
今天试着全用Figma做一个UI设计,无论是插图或是icon都是在Figma内画出来,Figma的画...
网路是怎样连接的(七)TCP的交互(下)
思考重点 TCP如何确认对方收到消息? 讯息收发中的头部消息变化? 关闭连接操作? 核心知识 封包的...
NestJs 延伸篇 - Federation 设定
Federation 设定 我们先让 Task 可以跟 gateway 接上 User 跟 Mess...