[Day 23] Facial Landmark
人脸关键点 (Facial Landmark)是找出人脸上五官的位置
而目前在应用上人脸关键点几乎都是使用Dlib提供的shape_predictor()方法来侦测,分为两种:
- 5 points 关键点
- 68 point 关键点
Dlib提供的方法是在一个已标注好的资料集上做训练,然後将训练好的模型给shape_predictor方法当参数使用。
这两种关键点的区别可以看下图:
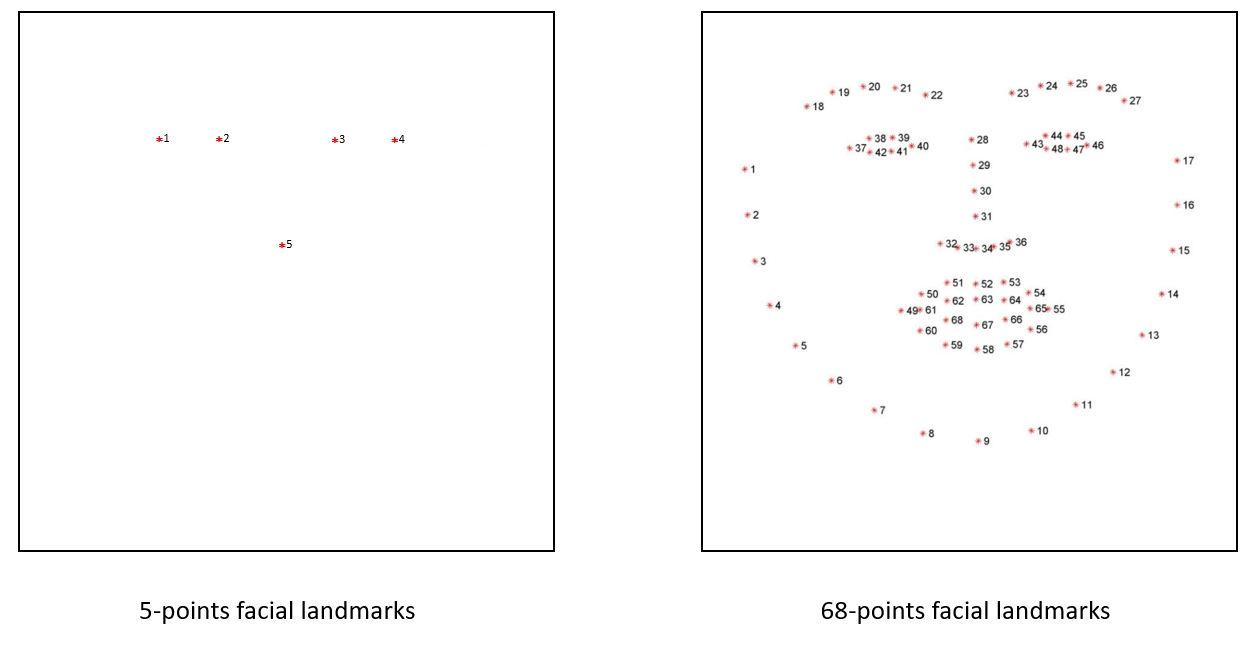
5个关键点会使用左眼头尾、右眼头尾、鼻头这五个点来做辨识;
68个关键点会使用外轮廓、左眉毛、右眉毛、左眼、右眼、鼻子、嘴巴共68个点来做辨识。
做人脸关键点的辨识要做什麽?
- 作为人脸对齐的前处理方法
- 表情侦测
- 眨眼侦测
- 脸部方向侦测
- ...
这个系列後续应用也会用到这个方法,
所以我们就了解一下要如何使用吧!
本文开始
- 开启这个系列的专案,在目录下新增一个
facial_landmark目录 - 新增一个档案
dlib_shape_predictor.py - 程序码与相关说明如下:
import ntpath import sys # resolve module import error in PyCharm sys.path.append(ntpath.dirname(ntpath.dirname(ntpath.abspath(__file__)))) import argparse import os import time from bz2 import decompress from urllib.request import urlretrieve import cv2 import dlib from imutils import face_utils from imutils.video import WebcamVideoStream # 注意这里我们用的是dlib: MMOD的方法来侦测人脸;你可以试着换dlib: HOG + SVM方法看看结果 from face_detection.dlib_mmod import detect def download(type): if type == 5: model_url = f"http://dlib.net/files/shape_predictor_5_face_landmarks.dat.bz2" model_name = "shape_predictor_5_face_landmarks.dat" else: model_url = f"https://github.com/davisking/dlib-models/raw/master/shape_predictor_68_face_landmarks_GTX.dat.bz2" model_name = "shape_predictor_68_face_landmarks_GTX.dat" if not os.path.exists(model_name): urlretrieve(model_url, model_name + ".bz2") with open(model_name, "wb") as new_file, open(model_name + ".bz2", "rb") as file: data = decompress(file.read()) new_file.write(data) os.remove(model_name + ".bz2") return model_name def main(): # 初始化arguments ap = argparse.ArgumentParser() # 预设使用5-points的关键点方法,可以改参数使用68-points ap.add_argument("-t", "--type", type=int, default=5, choices=[5, 68], help="the shape predictor type for prediction") args = vars(ap.parse_args()) # 下载模型相关档案 model_name = download(args["type"]) # 初始化关键点侦测模型 predictor = dlib.shape_predictor(model_name) # 启动WebCam vs = WebcamVideoStream().start() time.sleep(2.0) while True: frame = vs.read() gray = cv2.cvtColor(frame, cv2.COLOR_BGR2GRAY) rects = detect(frame, return_ori_result=True) for rect in rects: shape = predictor(gray, rect) shape = face_utils.shape_to_np(shape) (x, y, w, h) = face_utils.rect_to_bb(rect) cv2.rectangle(frame, (x, y), (x + w, y + h), (0, 255, 0), 2) for (s0, s1) in shape: cv2.circle(frame, (s0, s1), 1, (0, 0, 255), -1) # 另一种visualize人脸关键点结果的方法 # frame = face_utils.visualize_facial_landmarks(frame, shape) cv2.imshow("Frame", frame) key = cv2.waitKey(1) & 0xFF if key == ord("q"): break # 清除用不到的物件 cv2.destroyAllWindows() vs.stop() if __name__ == '__main__': main() - 在terminal直接输入
python facial_landmark/dlib_shape_predictor.py使用预设5-points,或是带参数-t 68改成使用68-points方法:
5个关键点
68个关键点
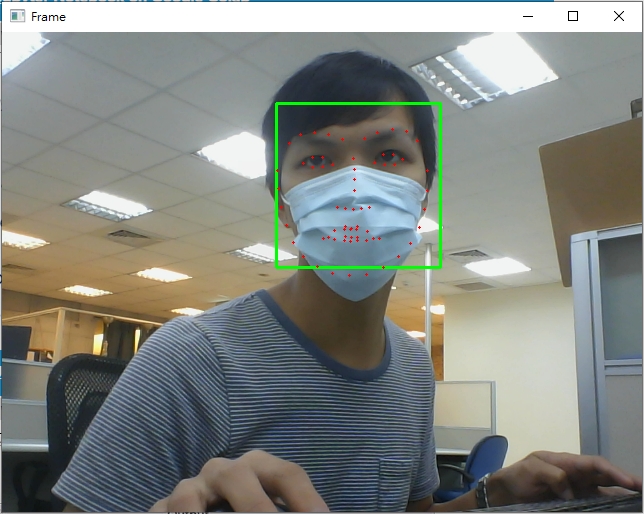
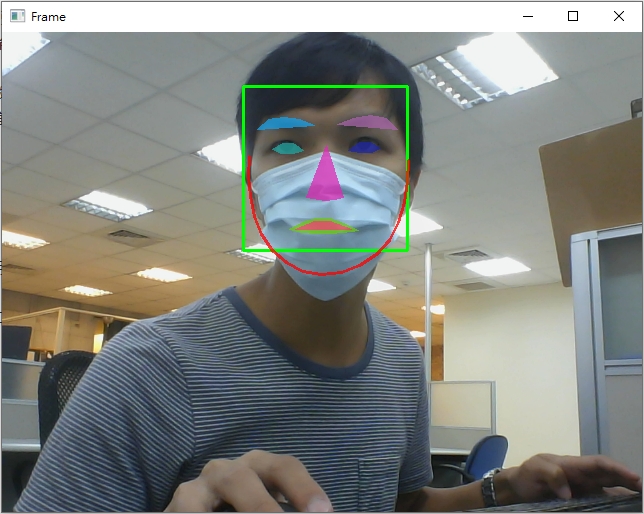
你也可以将程序码第72行注解取消,用另一种方式观看关键点辨识结果
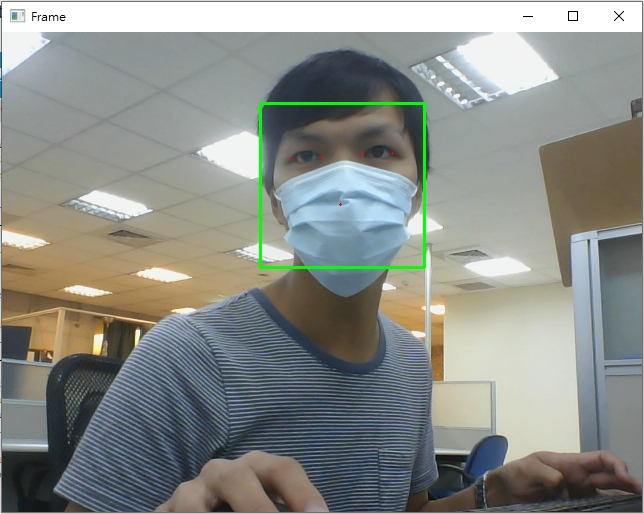
要做人脸关键点辨识,
第一步骤一定要先侦测人脸,
而本文使用Dlib: MMOD的脸部侦测方法 (为了戴口罩也能够侦测出脸部),
但如果脸部只剩下侧面脸,
Dlib的脸部侦测效果就不是很好,当然也就没办法做人脸关键点辨识。
下一篇文章我们将使用另一个也很常用来做人脸关键点辨识的模型 - MTCNN。
Today's Portal
<<: Day 23 : Tkinter-利用Python建立GUI(基本操作及布局篇)
>>: Day 32 - 透过手机呼叫 Amazon API Gateway 上传图片到 S3
使用 KSP 来改善 annotation processor?
就在我们用 KAPT 开发完这个 RSS library 後几个月 KSP 就发布了! KSP 的全...
ESP32_DAY5 来新建一个专案吧!
程序架构 昨天只有介绍到Arduino的程序架构可以分为两大函式: setup()及loop()。 ...
Day21 - 铁人付外挂设定介面(三)- 自订栏位
先来回顾一下目前铁人付金流外挂的资料夹结构: iron-pay ├── composer.json ...
Day8 阿里云架设网站-对象储存
说到物件式储存,可能大家有用过的是AWS的S3、GCP的GCS,OSS (Object Stora...
Day 14 - swift一些重要的细节
这几天差不多基本的都说完了。 所以今天我来给大家带一点一些很重要,但前面没讲到的细节。 错误处理 -...